xScheduler
Web Button Control
for
Mobile Audience Interaction
Introduction
Last Christmas I designed an inactive controller with two buttons (Back/Next) to allow spectators watching my Christmas lightshow to skip to the next, or go back to a previous song during the show. Now I thought I would devise a way to also engage the people who were driving up to watch or those who did not get close enough to interact with the buttons. I needed to design a Web Application that would allow viewers to interact with the show using their mobile phones.
I targeted the following design parameters:
- Simple: The interface must be simple, with only necessary elements.
- Intuitive: The button elements should clearly illustrate their function.
- Secure: Security exposure should be mitigated or reduce with proper infrastructure and program design.
- Responsive: The look and feel of the control elements should be consistent on any device
- Persistent data: Local data caching (where supported) should be implemented to improve performance.
xLlights xScheduler
xLights is a great open sourced software that is used by a growing number of people to schedule their Christmas lightshow. It includes a web client with button control elements, but it was not designed to be used as a spectator portal. So this cannot be used for this purposes.
Fortunately the designers allow the default web directory to be replaced with a custom design. It also includes an easy to use API that make it possible to construct a custom web interface to required specifications.
The xLights Scheduler is not only a HTTP server but also a Web Socket server. This means that there can be a persistent connection between a client and the server that facilitates real-time data transfer, so both parties can send and receive data at any time with lower overhead cost.
The Design
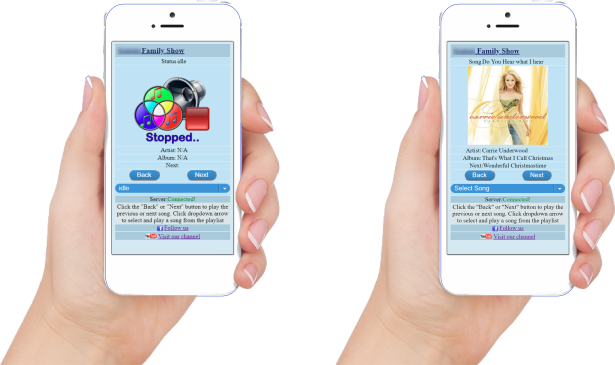
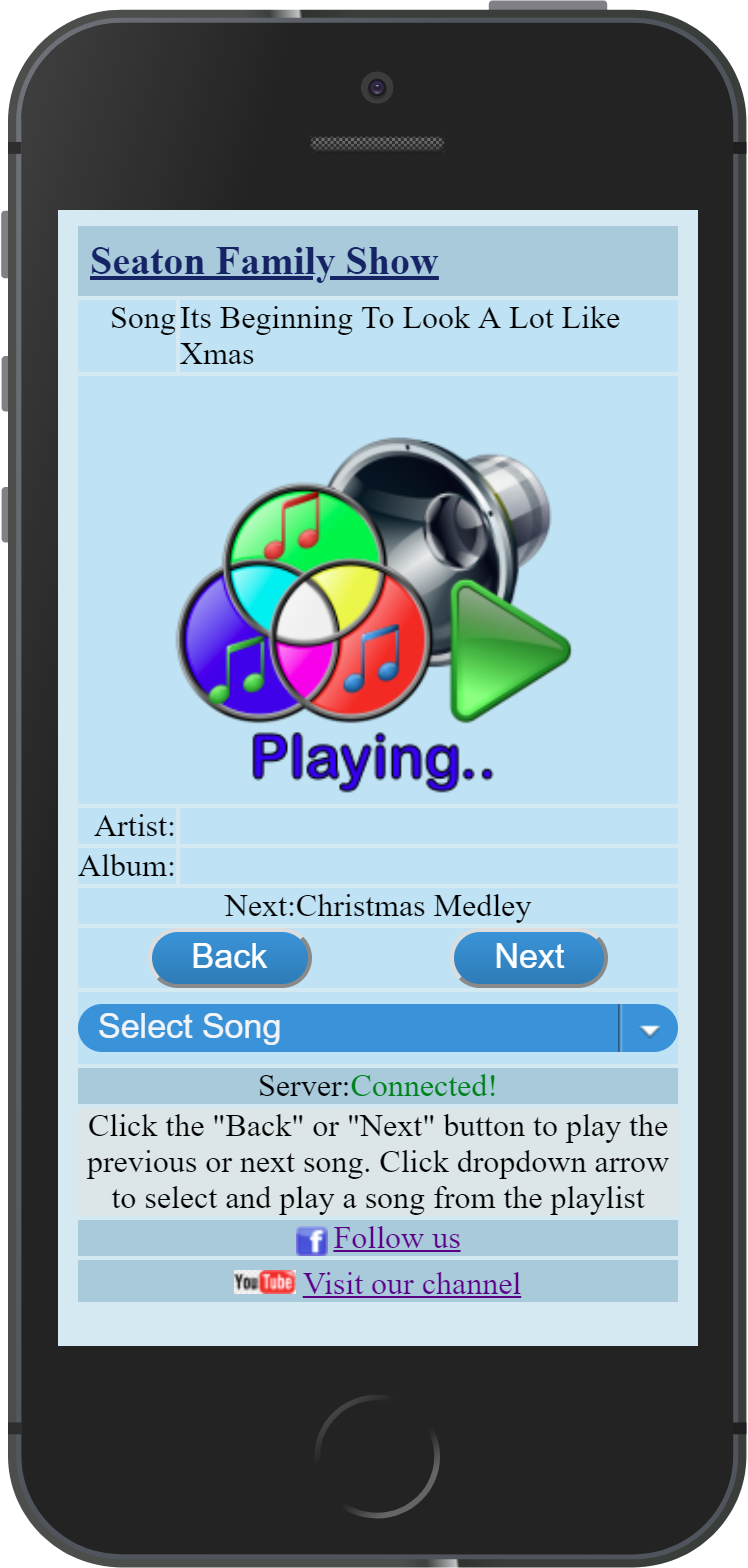
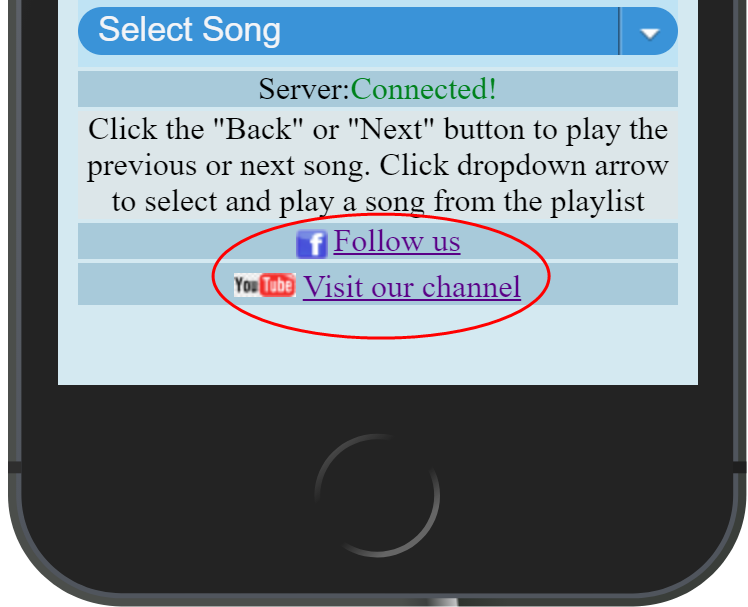
The web client featured in this document (figure 3) is designed with plan JavaScript as a Web Socket client, with two buttons and a drop-down combo box that not only allow the viewer to move back and forward in a playlist, but to also jump to a specified song in a playlist. This design supports the addition of a song image in addition to the artist and album name.
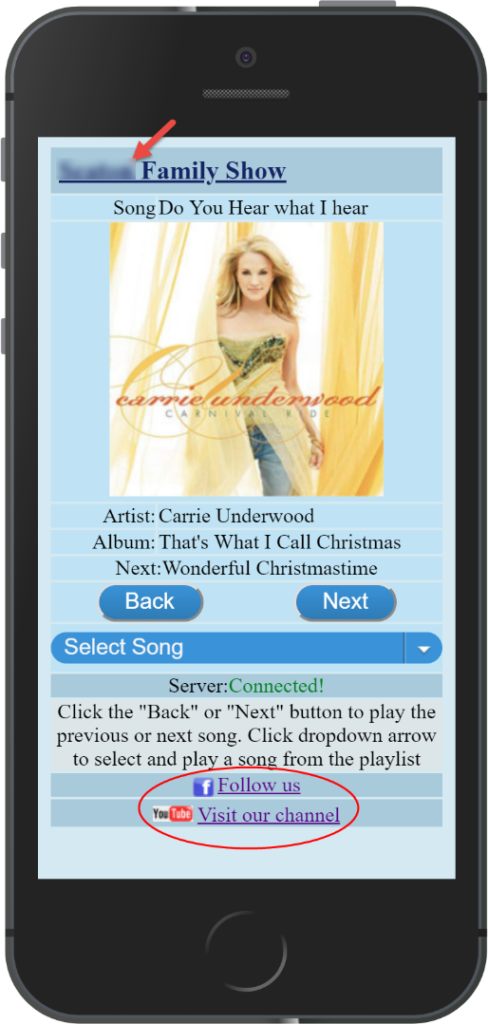
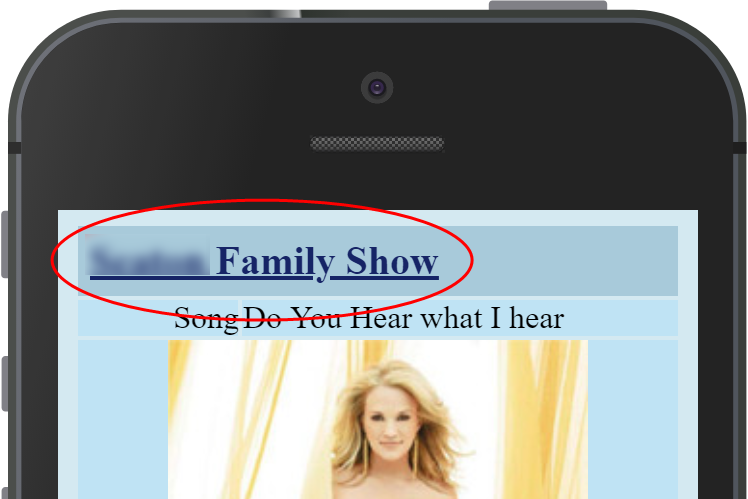
At the top of the screen is the show title and at the bottom are links to a Facebook page/group and a YouTube channel. These values are pulled from the show’s setting file “show.dat” (described later), and are customizable.
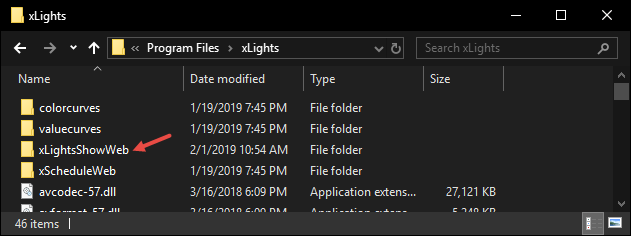
There are several options for implementing this custom web client, but the simplest way is to replace the default xScheduleWeb folder with your own folder containing the files for the custom web client.
In this scenario it was replaced it with xLightsShowWeb. The folder with the custom site should exist on the xLights Scheduler server (figure 4).
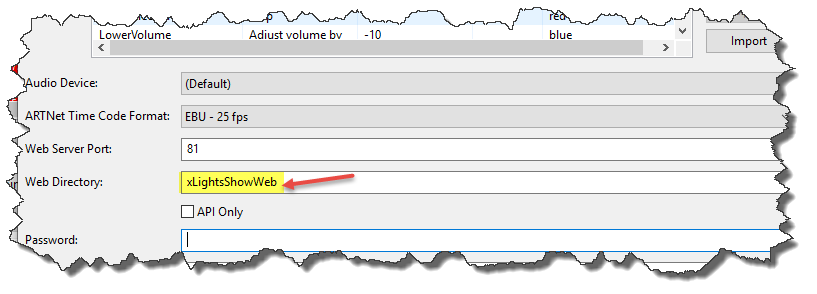
To replace Web client folder, open the xLights Scheduler and select “Edit” – “Options”: from the main menu.

Enter the folder name in the “Web Directory” field and click “Ok”
An example of the custom app featured in this article may be downloaded from the following GitHub repository.
The Process
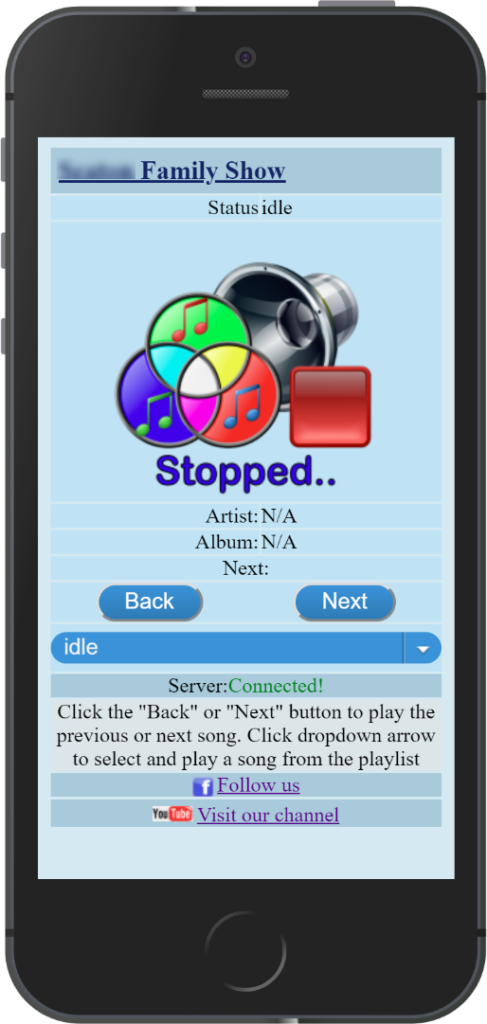
When the client connects to the xScheduler Socket server for first timer, it receives the current status, which could be “Idle”, “Paused” or “Playing”. If the current status is “Playing”, the current step (song) and the playlist name will be included in the status updates sent from the xScheduler server.
The client uses the playlist name to request the songs in current playlist, and stores the returned list of songs to the local (browser) storage.
If the current step changes, the client receives the new “step” and “next step” and use this (in addition to the stored data) to update the screen. However, the album/song image, album, and artist names will not be available initially, because this information is not provided by the xScheduler Socket server. The additional data has to be manually entered as an initial setup process after the local storage data is created.
To see the data in a Chrome browser, press Ctrl+Shift+I and select the application menu, Local Storage on the left and click the localhost IP (figure 7).
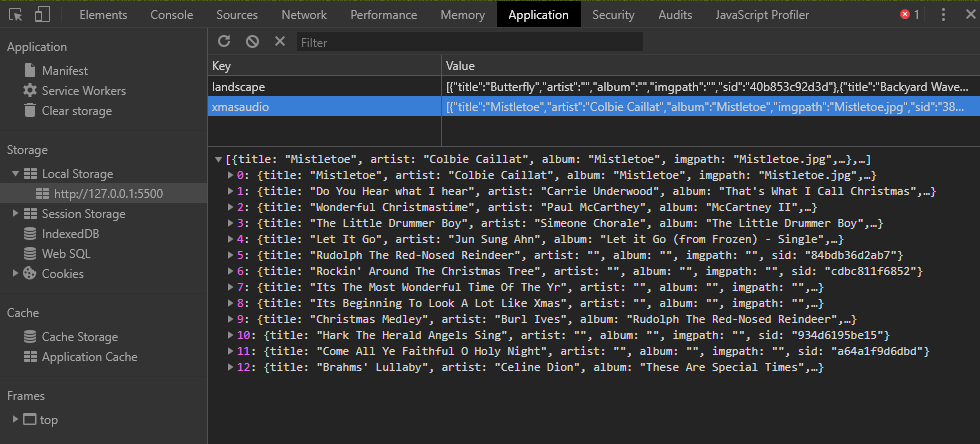
Only the song title, artist, album and image names (not actual image) are stored in the local storage. Open the /pages/playlist.html file in the browser on the local server, to edit the data in the local store and add the missing information. This action will not be necessary after xLights developers add this data to the API (assuming it is not already available).
Once all the missing information in the local store is added, click the “Upload” button to manually upload the data to the server (\xLights\xScheduleData). The server will then push the new data to the local stores of all connected clients. More detailed information will be provided in the “How To” section.
The client will first look in the /img subfolder on the server for the actual files referenced in “imgpath” field of the local store (image file should be 218X218 *.jpg). If the client does not find the image, it will look for a *.jpg image file that matches the name of the step/song, if one does not exist, it will use the default img/ShowPlaying.png file. If the artist and album fields are not populated in the local store, they are left blank on the screen.
Adding Custom Data:
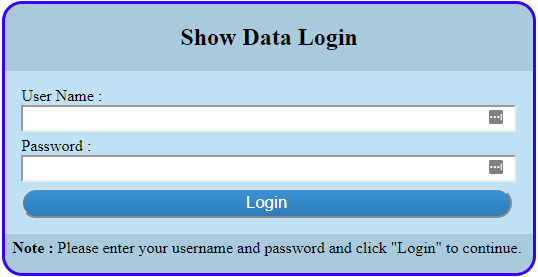
Open a browse on the xSchedule server and enter the following url, [Server]:[Port]/xLightsShowWeb/pages/playlist.html, when the login prompt appears, enter “ShowAdmin” in the “User Name” field and “xShowButtons” in the Password field and click “login”
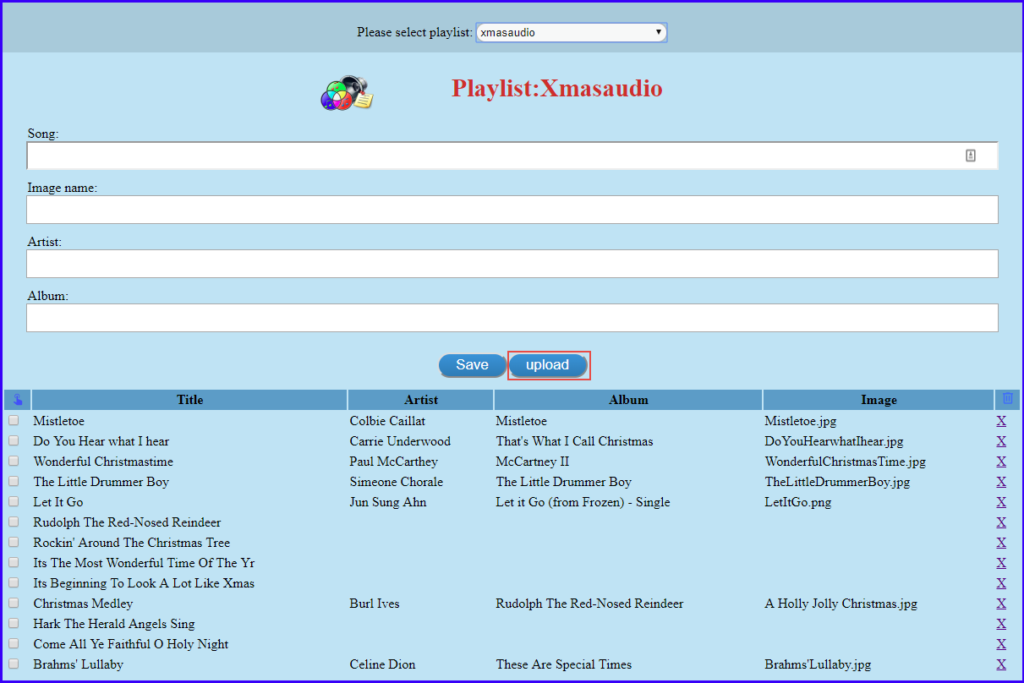
There will be a prompt to select a playlist if there are multiple playlist in the local store. Select the desired one from the dropdown list. Click on the check box to the left of a title and the available information will populate the relevant fields at the top of the form. Enter the additional information and click save. Continue until all the missing information is added.
Now click “Upload”.
The file save dialog window will open and prompt to store the data, select the default xLights data store folder (\xLights\xScheduleData). Get[PlayListName].dat will be provided in the file name field of the file save dialog; ALWAYS USE THE NAME PROVIDED.

The GetShow.dat file stores the custom data for the show, it is created when the client loads for the first time.

The data in the GetShow.dat file is in JSON format and may be changed to include relevant custom data.
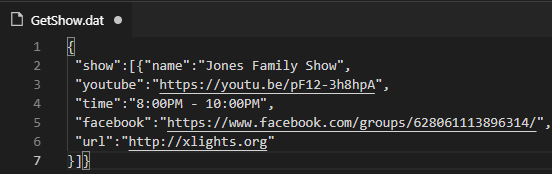
The show title and links are pulled from the GetShow.dat file. The default for the title is “Our Family Show” and the links will be blank if the file can’t be loaded. The Youtube link in the file is to the “Christmas lights from around the world show” and the Facebook link is to the the xLlights group. So please be sure to change them.
Implementation
There are two ways to impliment the web button controller:
- Using a domain URL (http://lightshow.homeplace.com) that resolves to the firewall (WAN).
- A WiFi access point (SSID= lightshow) that connects to a Captive Portal (on isolated VLAN) and authentictes the client.
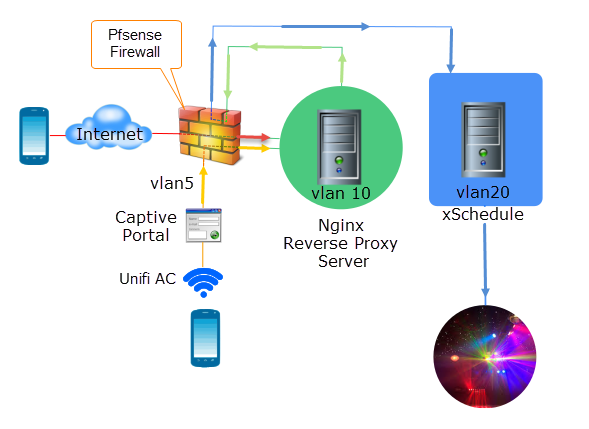
Domain URL: This is the prefered method because it is a simple process for the end user, they are only required to type a URL in the browser on their mobile device (no port number). This obviously requires a domain name and a dynamic DNS service (most homes don’t have a ststic IP).
In this configuration the domain name resolves WAN traffic to a firewall (router) with some form of intrusion detection software. The firewall rule, (which has a schedule that matches the show times), forwards port 80 traffic to a Reverse Proxy server (on VLAN x) that in turns forwards the traffic to a Windows (Or Linux) machine running the xScheduler (on VLAN y). The Reverse Proxy server is the only IP on network x that is allowed to send traffic (through the firewall for different VLANs) to the xScheduler on network x.
NGINX is a free, open-source reverse proxy server that offers many security and protection benefits over a straight through (port forwarding) connection. The Nginx server also supports Hop-by-hop headers which are essential for forwarding web Socket request. The connection from WAN to the Reverse Proxy server should be secure HTTPS, this requires a certificate.
WiFi Access Point: This method requires a few more steps including authentication for the user, this and the fact that they are connecting to an unknown WiFi AC may be a deterant for some users.

The first step in this method is to locate the SSID (eg:“xmashow” figure 17) and enter the provided password to connect to the network.

The user is then redirected to a Captive portal (figure 18) to accept the terms, then finally redirect to the web controller page.
The DHCP for this network (VLAN z) will ony assign a maximum of 4 IPs and only those 4 will be allowed through the firewall during show time.
The Captive Portal will disconnect the user after 5 minutes and the connection cannot be reestablished before 10 minutes has expired.
One of the down sides of this method is that If the user disconnects within 5 minutes, he or she will not be redirected to the site after reconnecting to the network, and must manually enter the server name into the browser to get back to the site because they are already logged in the network. This is the only option because of the firewall rules and it could cause confusion.
On benefit of the WiFi AP over the Domain URL is that an attacker would have to be within the range of the wireless Access Point. In either method the client connections are constantly being tracked and may be blacklisted if necessary, by using their MAC address. Users may also be blocked from browsing the internet, however the Facebook and YouTube links will not resolve.
Infrastructure
Access Point: The (outdoor) Ubiquiti UAP-AC-M-US Unifi Access Point is a good option because it allows up to 5 wireless access points (encapsulated in VLANS) in the same device. It uses a mesh technology so users don’t have to decide between 5 or 2.4Ghz. It also includes a Captive Portal, guest and group accounts with event reporting and alerting.
Firewall: An open source software like Pfsense is ideal. One that will run on a Raspberry PI or older computer with a 4 port (or 4 single port ) NIC. Pfsense can not only send an alert when a client is logged on, but also trace a client activity from start to finish. Pfsense Snort plugin has some predefined algorithm that can detect and block network anomalies.
Virtual Machines: The xScheduler must be installed on a physical machine because of hardware requirements, but other software like the Reverse Proxy or Pfsense will run successfully from HyperV, VMware ESXi, or Virtual Box which are all free. Virtual machines provide good fault tolerance because snap shots allow quick recovery
Switch: A layer 3 switch is recommended when working with multiple VLANs and/or subnets A layer 3 switch allows each port or group of ports to be configured as a different network/subnet. Many pre-owned Cisco switches like the Cisco WS-C3750G-24T-S may be purchased at a reasonable price on Ebay.
Reverse Proxy: A Reverse Proxy hides the topology and characteristics of your back-end machine and prevents attacks like DDOS. It handles incoming HTTPS connections, decrypt the requests before sending it, reducing the load and the need to install certificates on back end web server. Nginx is one of the few options for Reverse Proxy when using Web Sockets because of its support for the Hop-by-hop protocol. It has a small footprint and can handle a large number of concurrent clients. It can enforce Content-Security-Policy and Strict-Transport-Security using HTTP headers. Please see following link on How to install NGINX on Ubuntu 10.04.
Ubuntu: Ubuntu is a good OS for hosting NGINX, the latest version is located here Ubuntu 18.10
Conclusion:
Spectator participation in a Christmas light-show is part of the Christmas spirit of giving and sharing, and much like all great things, it comes with great responsibility, and since we can’t rely on all the spectators to be responsible, implementing proper structures and procedures is important in ensuring that everyone will have a pleasant and memorable experience.
2 thoughts on “xLights Mobile Web Control”
Interesting blog! Is your theme custom made or did you download it from somewhere? A design like yours with a few simple tweeks would really make my blog shine. Please let me know where you got your theme. Appreciate it| Gretel Leonid Rosenbaum
It called Sydney by aTheme at https://athemes.com/theme/sydney