This is a tutorial on how to create a xLights xScheduler interactive button prop that will engage spectators by allowing them to manually move backward or forward through a playlist of a xLights light show sequence by selecting a “Back” or “Next” buttons.
Required items:
- Buck Converter
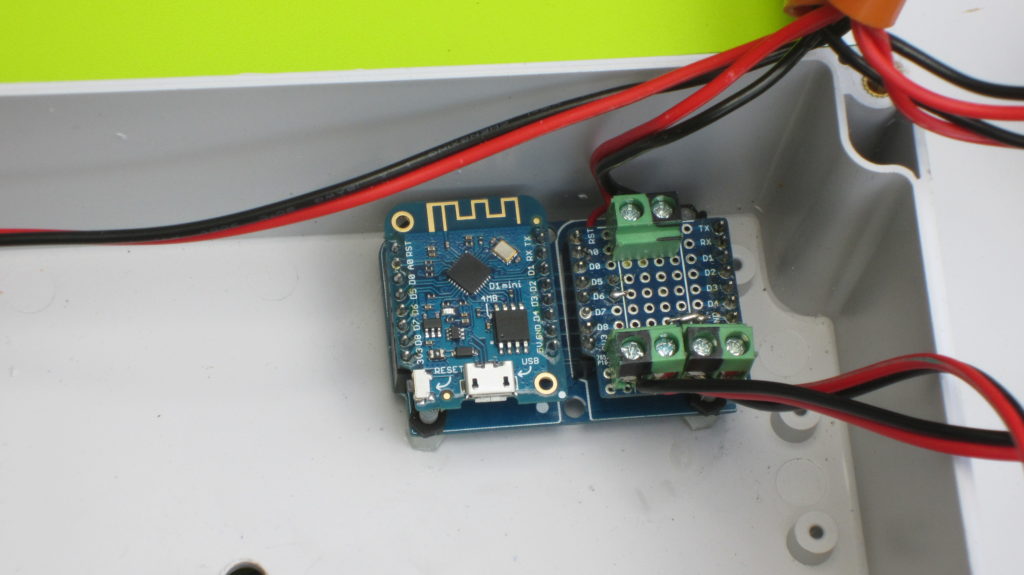
- Wemos D1 Mini
- Wemos Protoboard Shield (Optional)
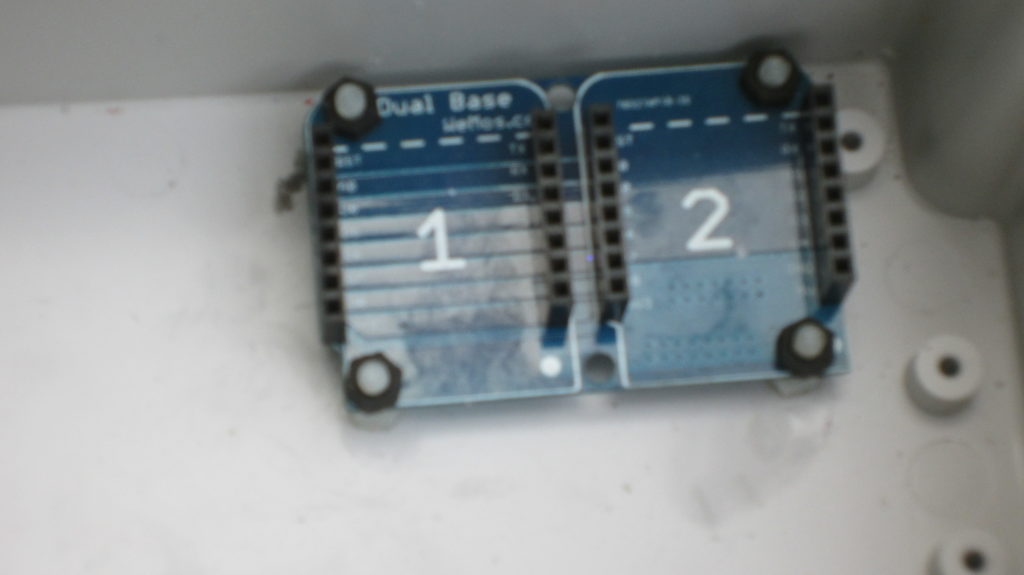
- Wemos Dual Base Shield (Optional)
- Button Switch
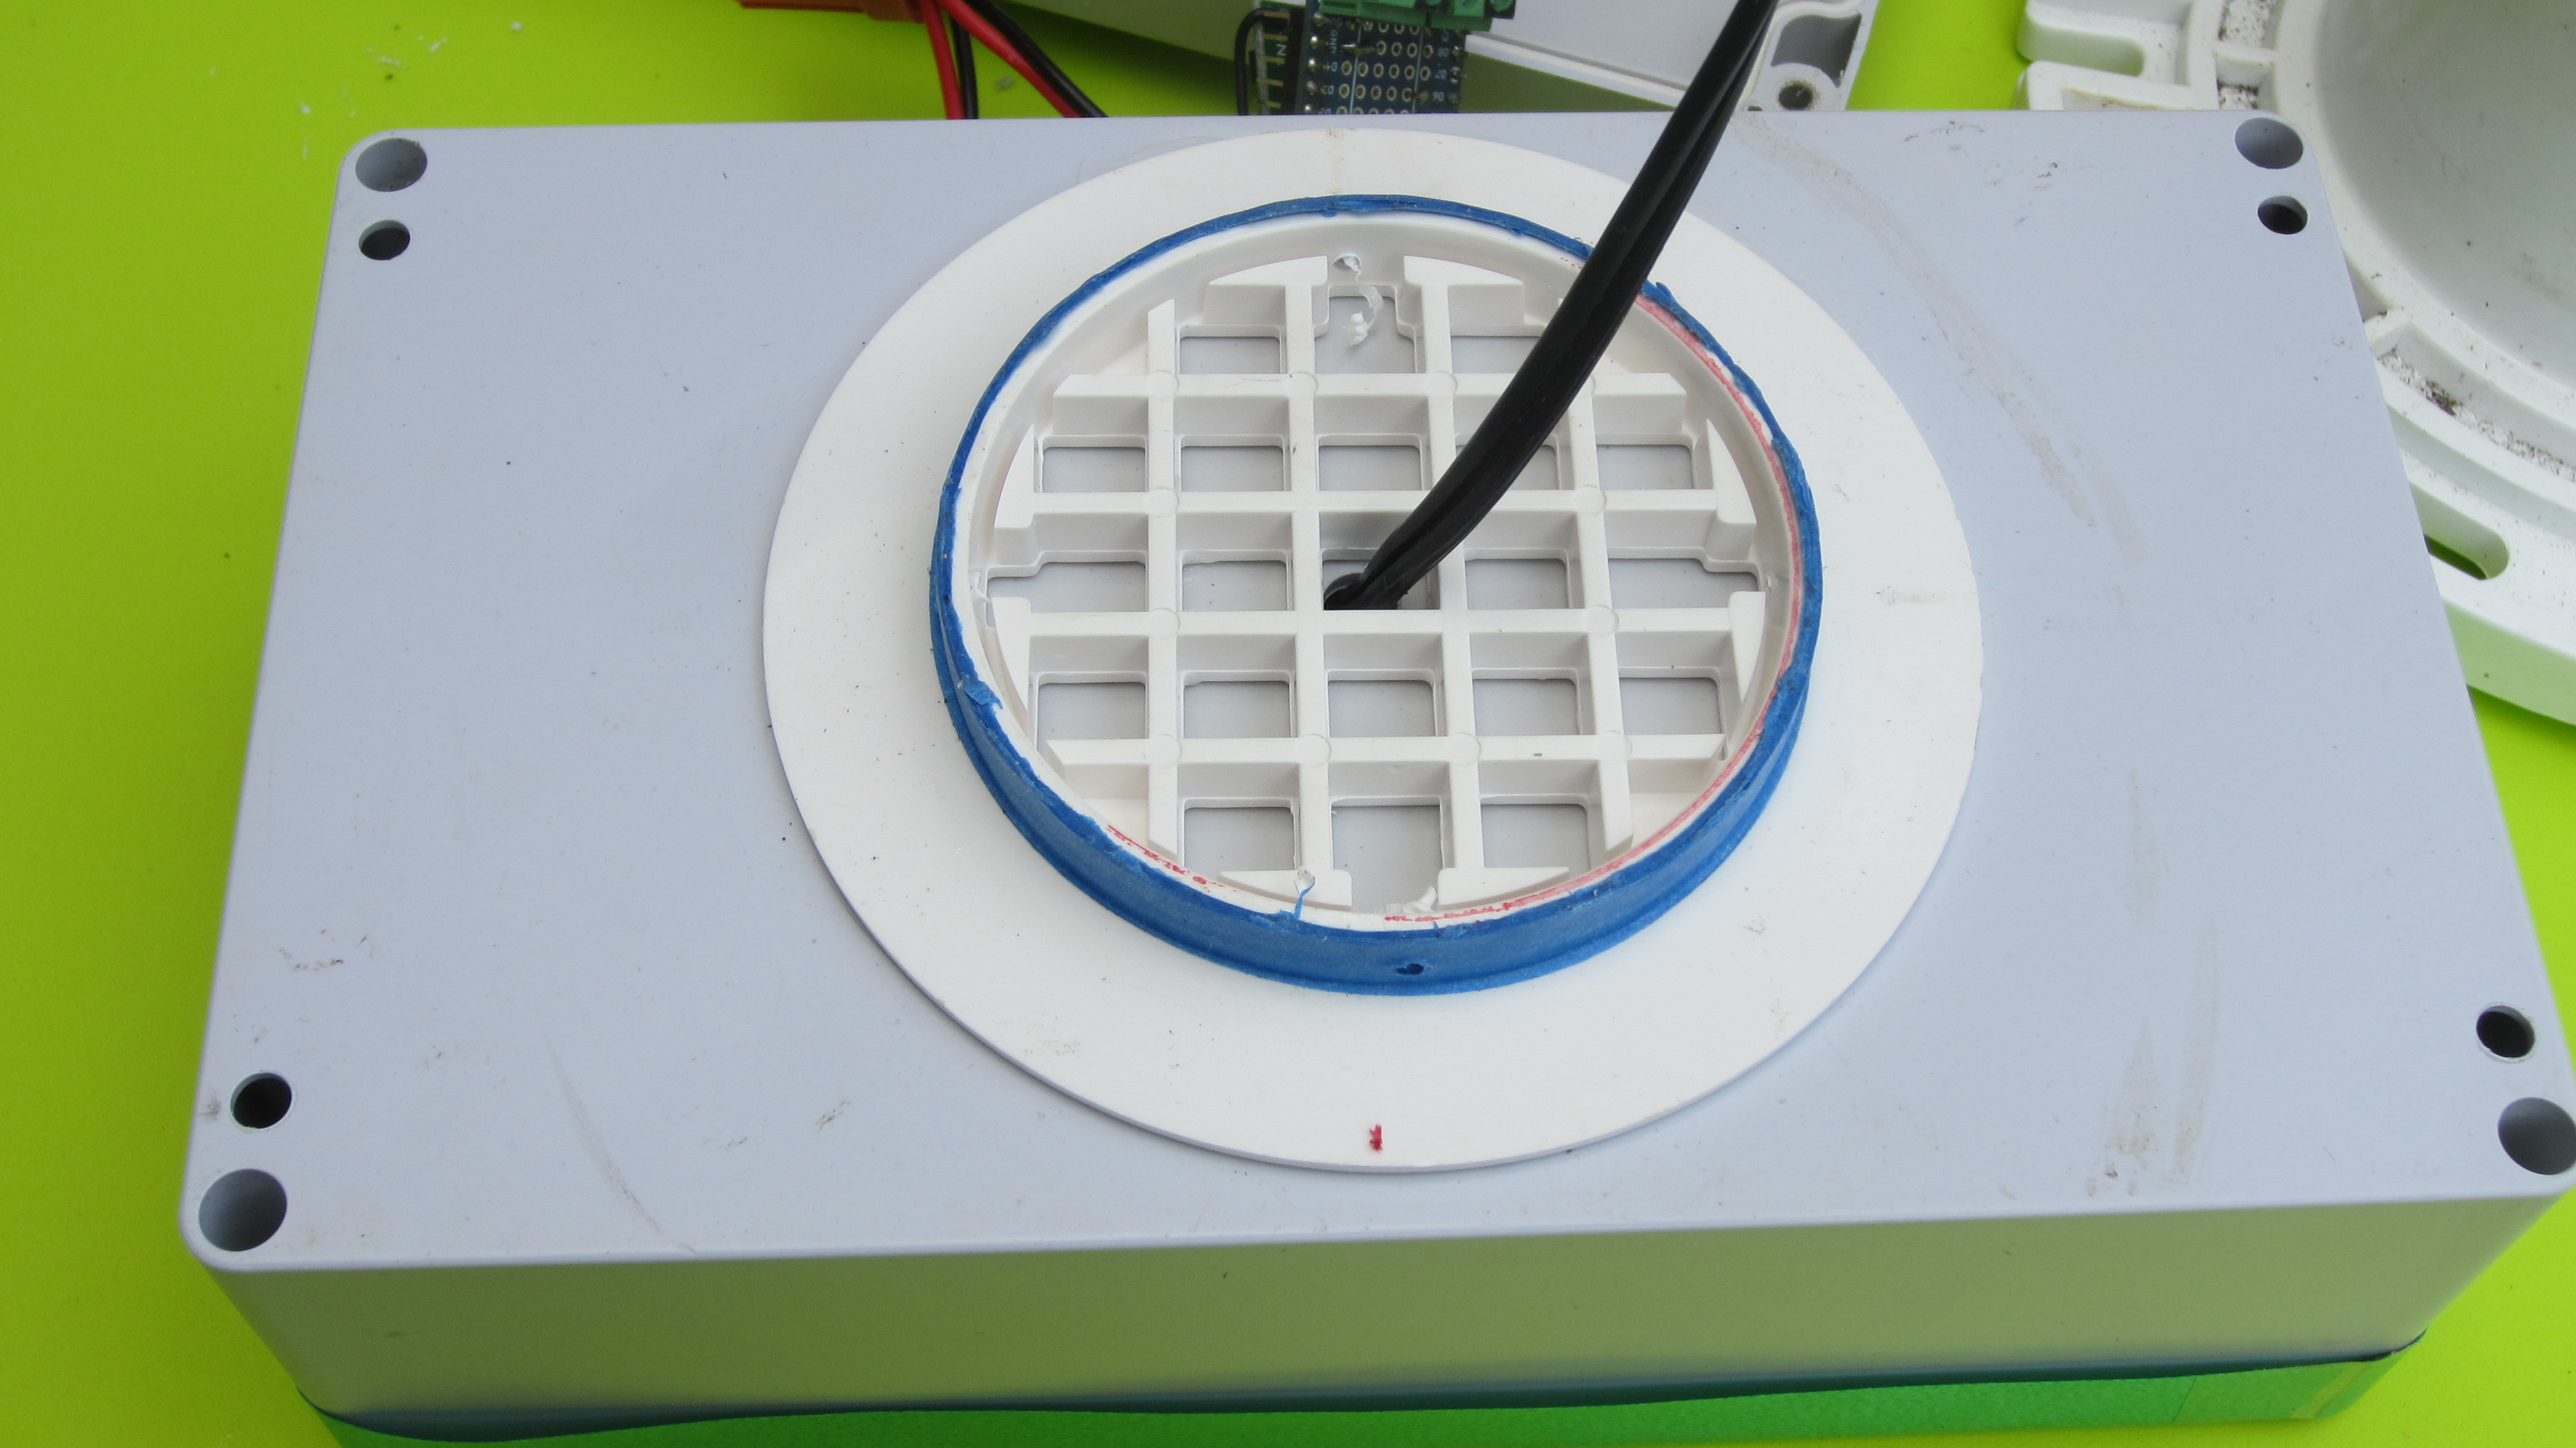
- Drain Cover
- Waterproof Project Box
- 12 Volt Power Supply
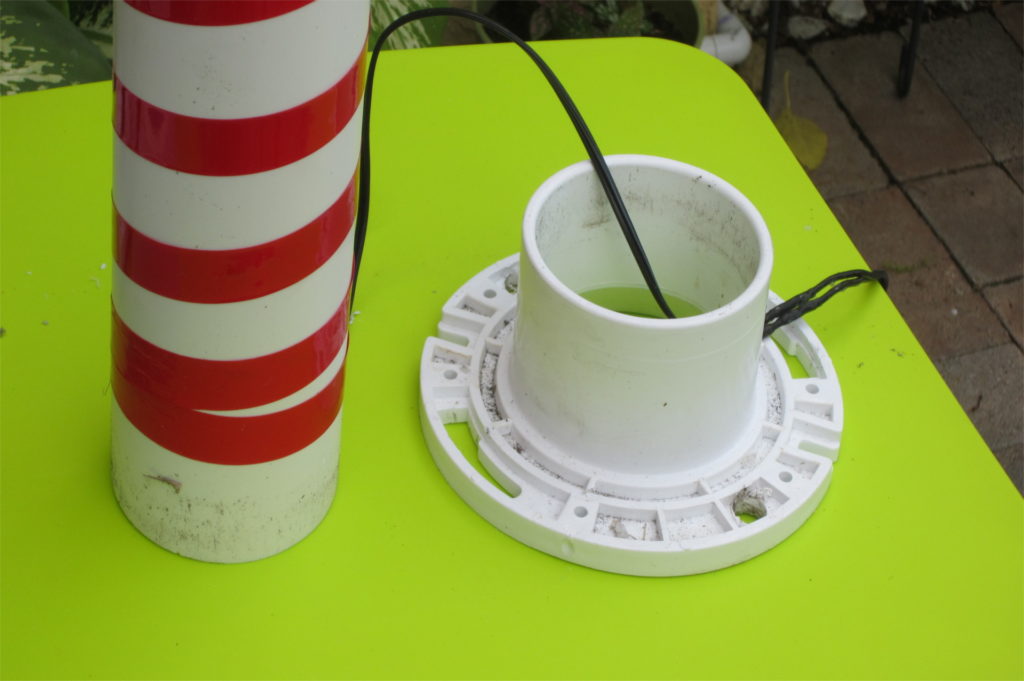
- 3″ PVC Pipe
- PVC Closet Flange
- Modified Code
Details:
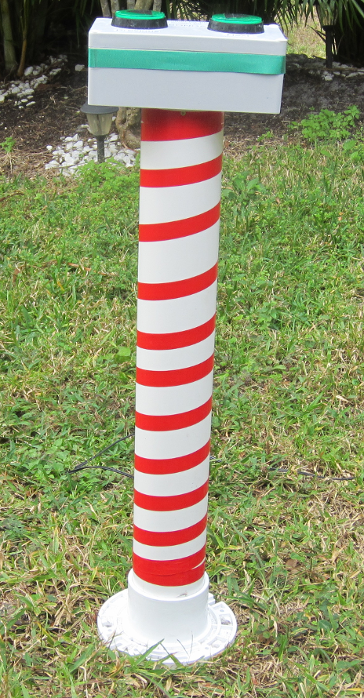
It stands about 36 inches and is decorated with red and green ribbons for that true Christmas theme. The support post is about 26 inches high, and is made from 3 inch diameter PVC pipe and is inserted into a closet flange that is attached to the ground with 6 inch metal spikes.

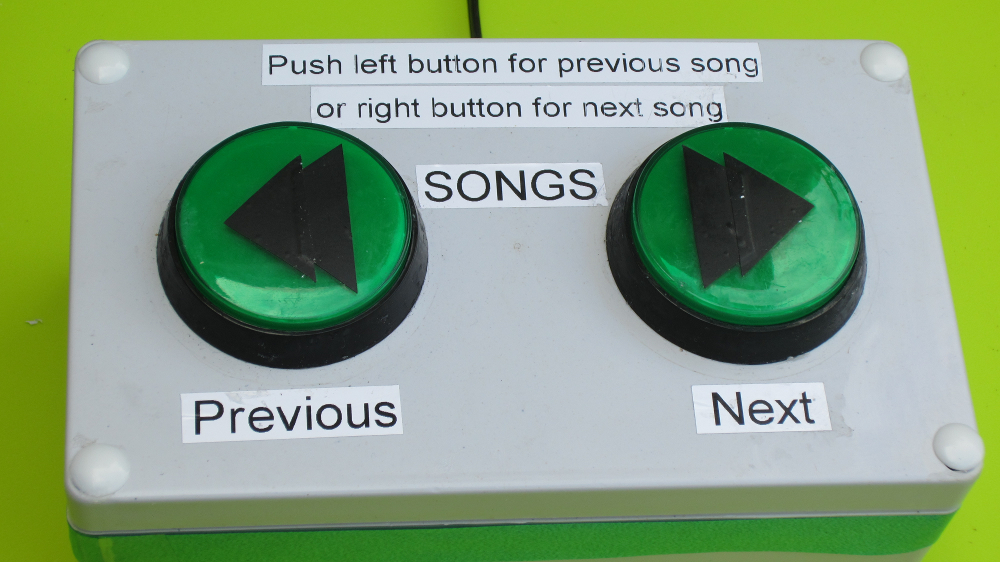
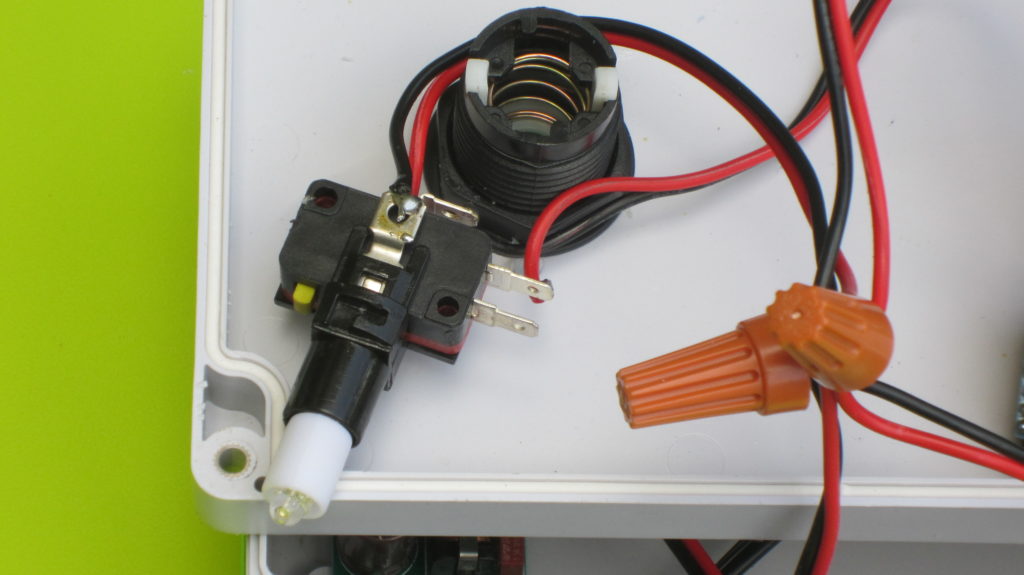
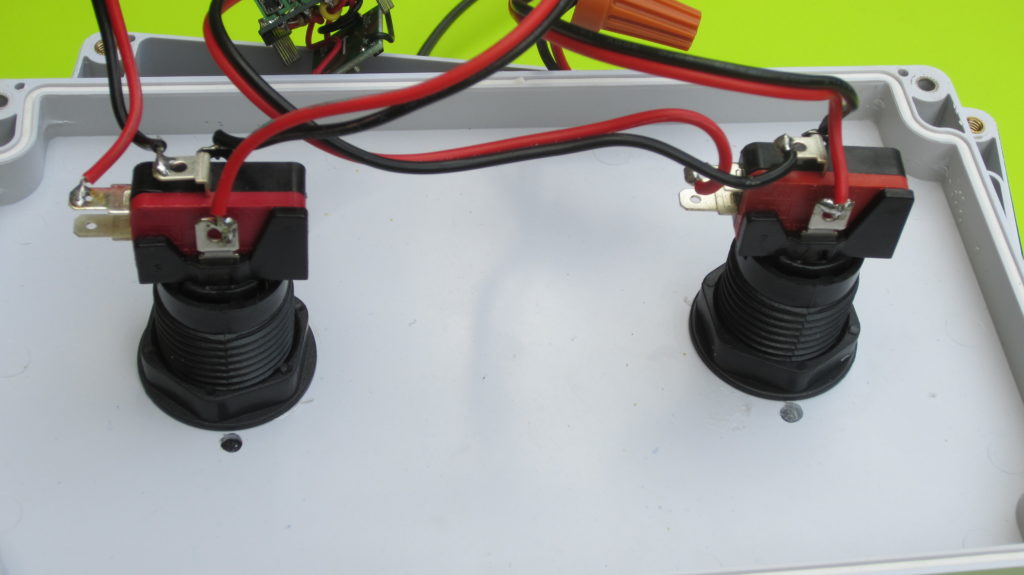
The buttons are attached to a 5 x 8 waterproof project box mounter on top of the PVC pipe with a drain cover. The instructions and the function of each buttons is clearly labeled across the surface of the box.
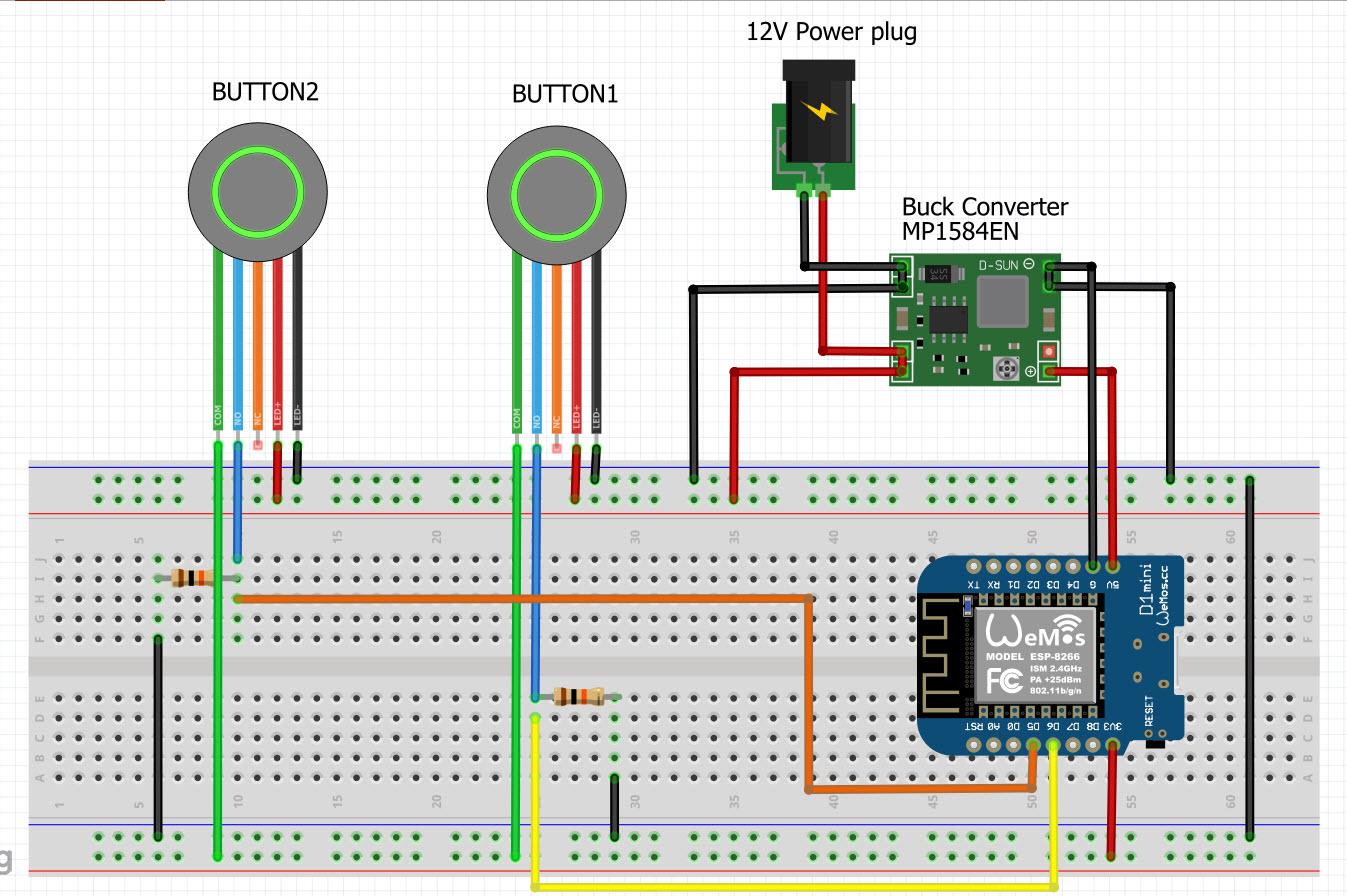
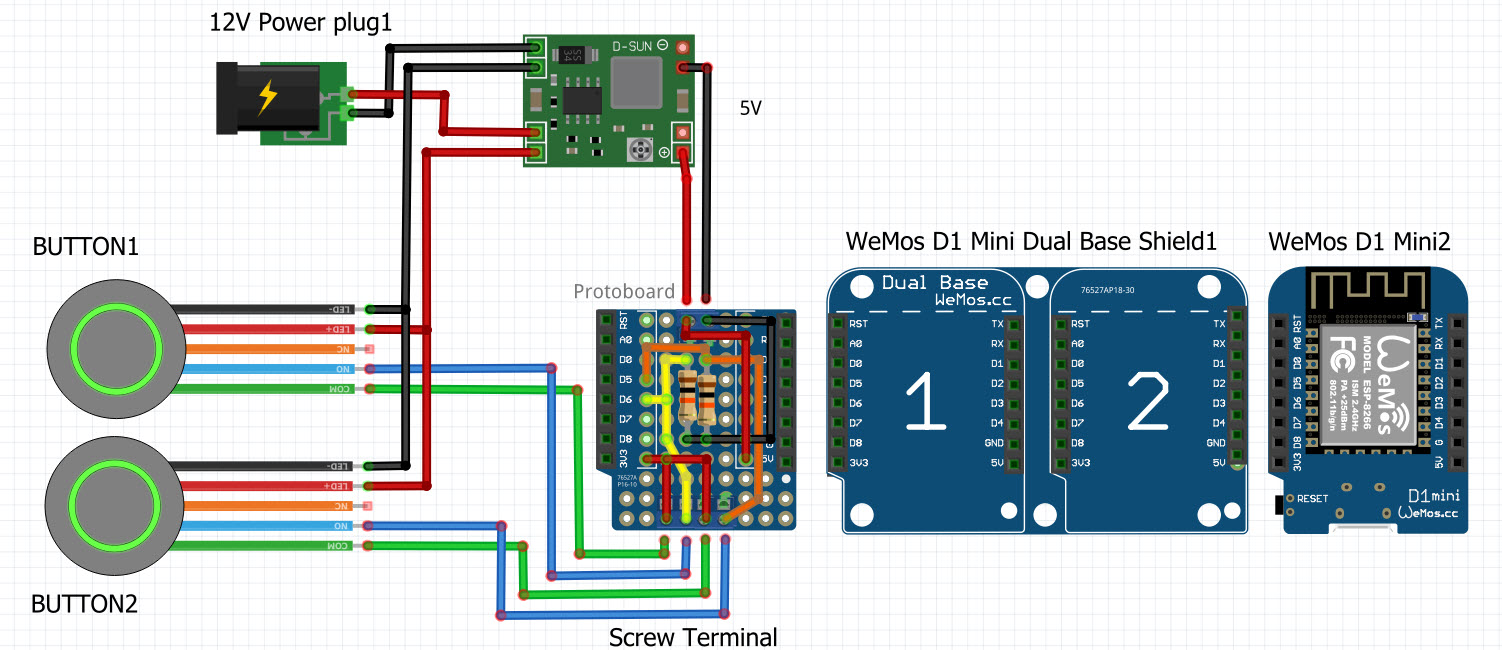
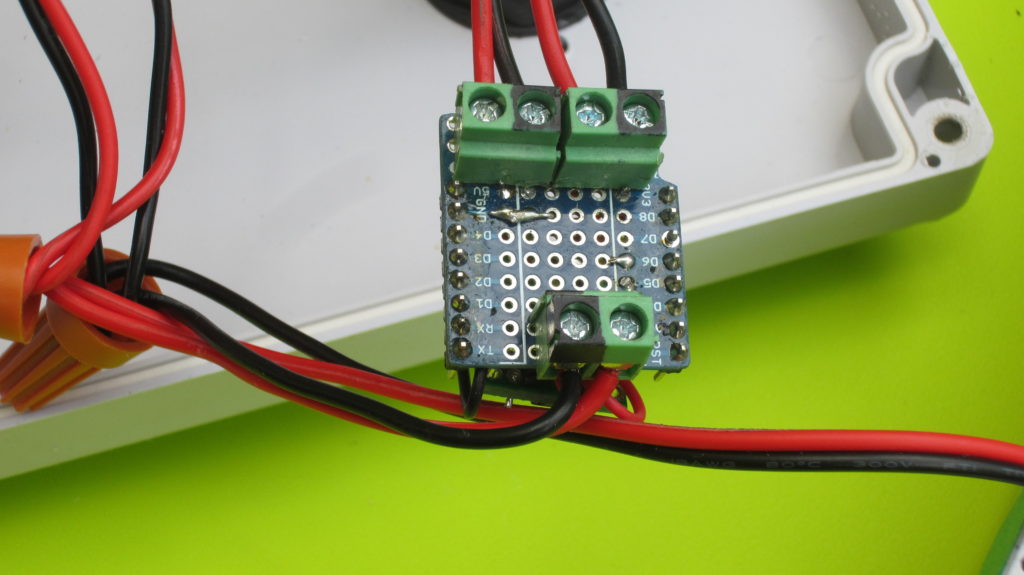
The normally open pin of each switch connects to D5 (GPIO14) and D6 (GPIO12) respectively of the D1 Mini. Both normally open pins of each switch are also pulled to ground by a 10K Ohm resistor. The common of each switch are is connected to 5v.

There is a button sketch on the xLights GitHub repository, however this was designed for an Arduino with an Ethernet shield and has to be modified to work correctly with the ESP8266 .
The code
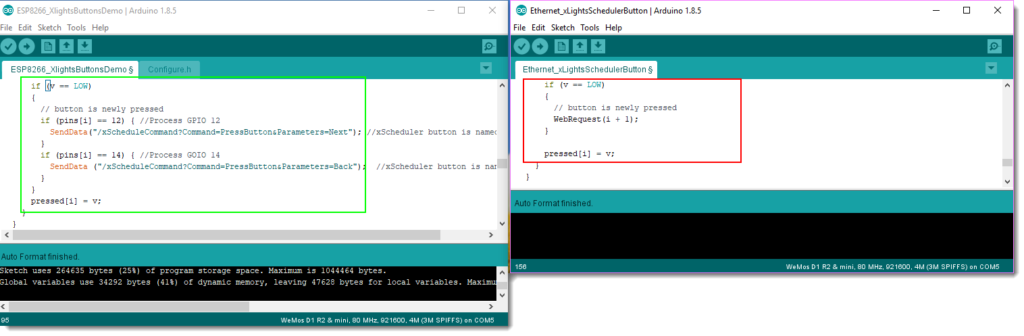
The original sketch was designed for a Arduino with an Ethernet shield, so it has to be modified to work with the ESP8266. The first change is to create variables for the SSID, Password and Host of the xLights Scheduler. These will replace the connection variables in the original sketch.
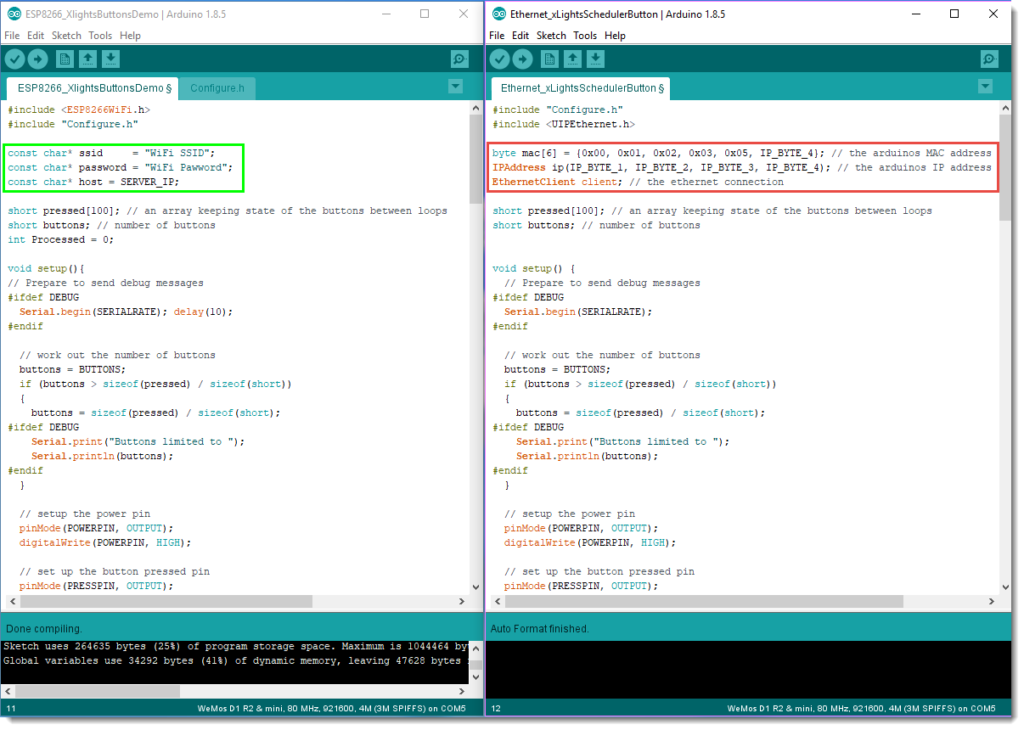
The Ethernet network connection configuration must also replaced with the WiFi connection configuration for the SSID of the Access Point the ESP8266 will connect.

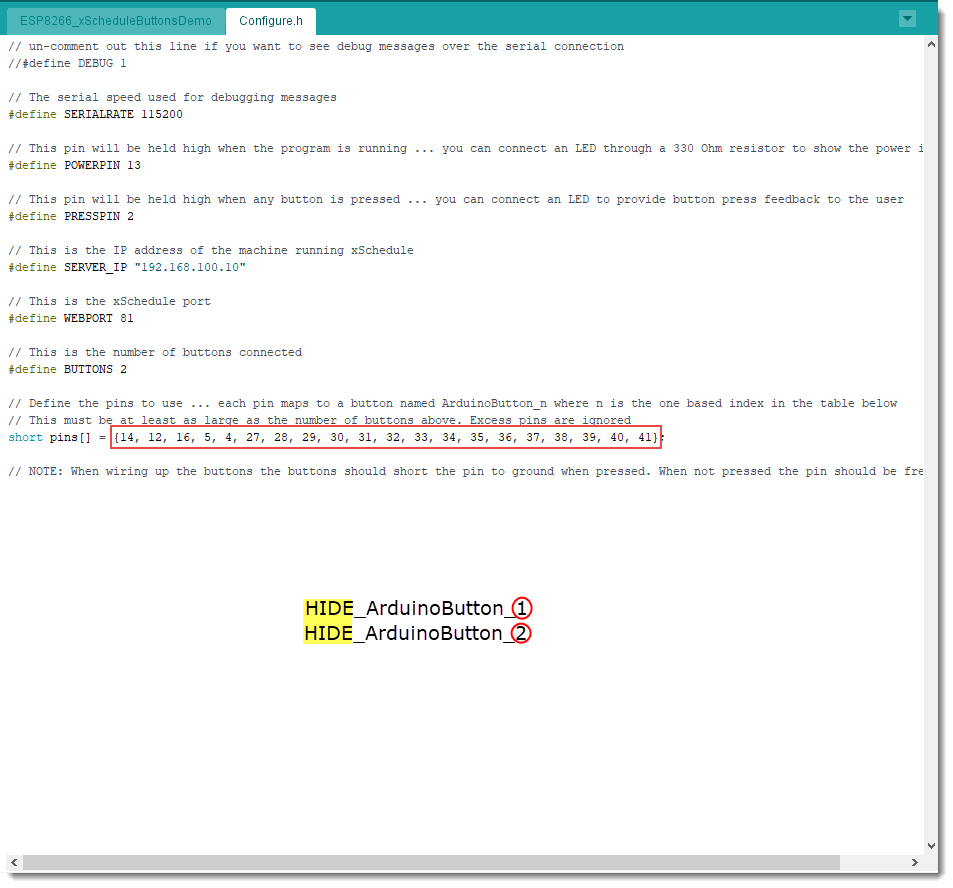
Each button in the original sketch has the same name with a different numerical sequential suffices that represents it’s position in the pins[] Array of the Configure.h file. The buttons are created in the scheduler and are prefix with the HIDE flag to make then invisible in the scheduler during normal operation. In the typical button scenario, the button press is cached and the event associated the each button is executed in the order the button was pressed.
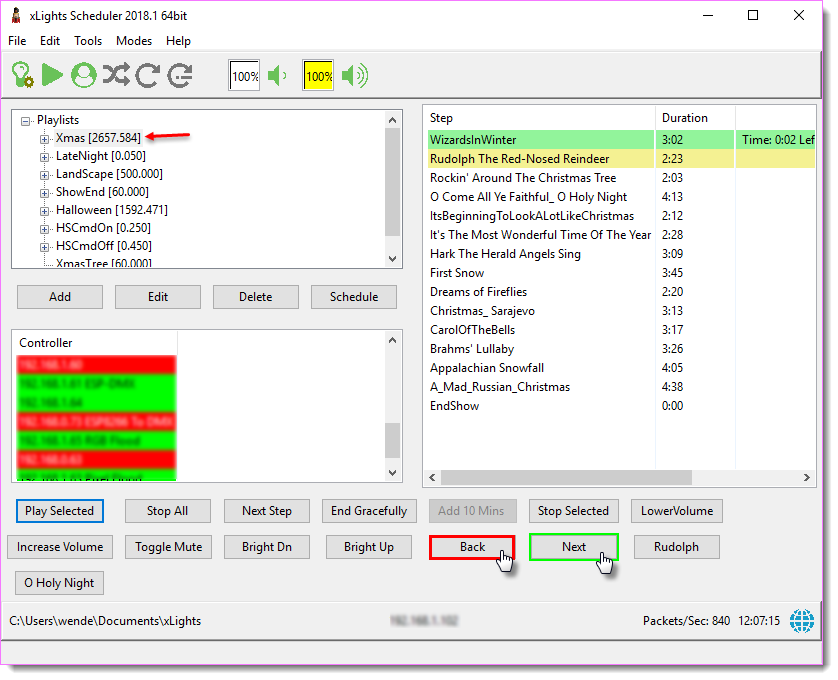
The above scenario is great when numerous button press event are used, however in this example the same “Back” and “Next” button visible in the the scheduler was targeted, figure 10.
I use GPIO 12 and 14, so I set the first entry in the “pins” array to 14 and 12 and set the “Buttons” variable to 2, figure 9. I then modified a section of the button press event to only capture changes to pin 12 and 14, figure 11.
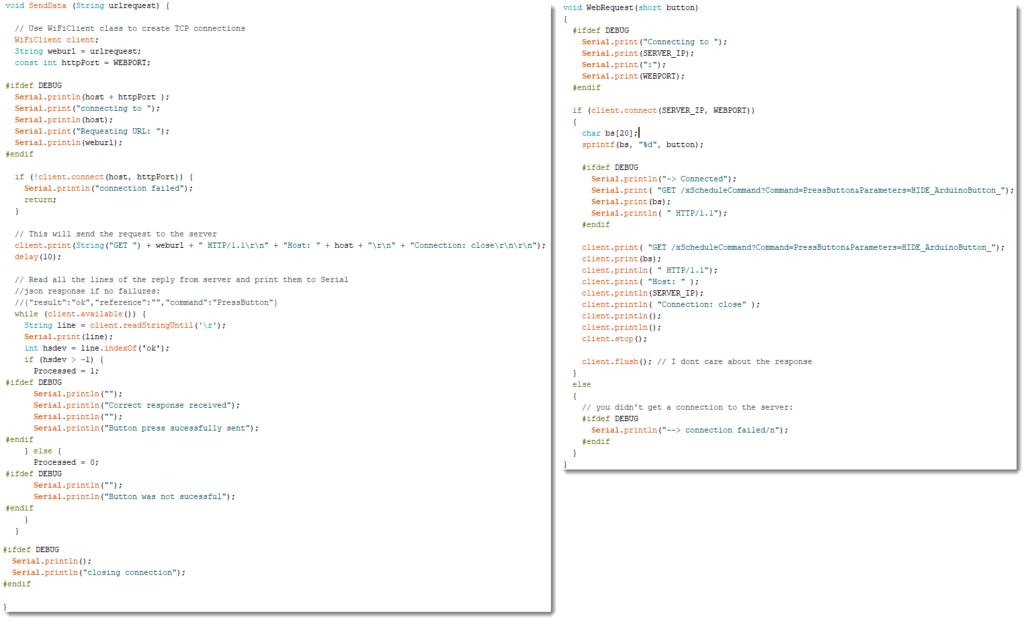
The button command is then sent to the SendData function which formats and sends the command to the xScheduler server. The sendData function replaces the WebRequest function in the original sketch.
One thought on “xLights Interactive Buttons”
Thanks so much for the blog post. Really thank you! Cool. Tarrah Jakob Napoleon